1. Registering a Merchant Account
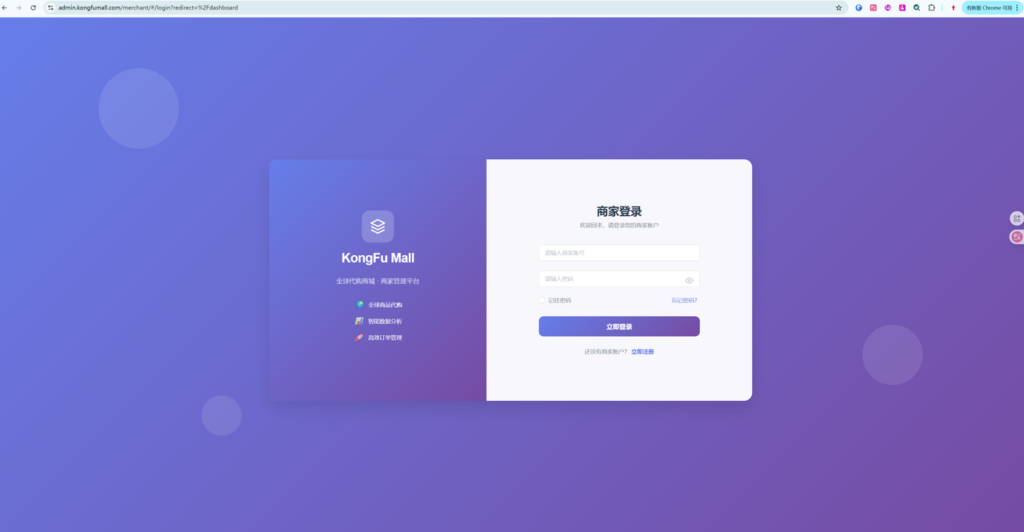
Merchant Backend Address: https://admin.kongfumall.com/merchant/
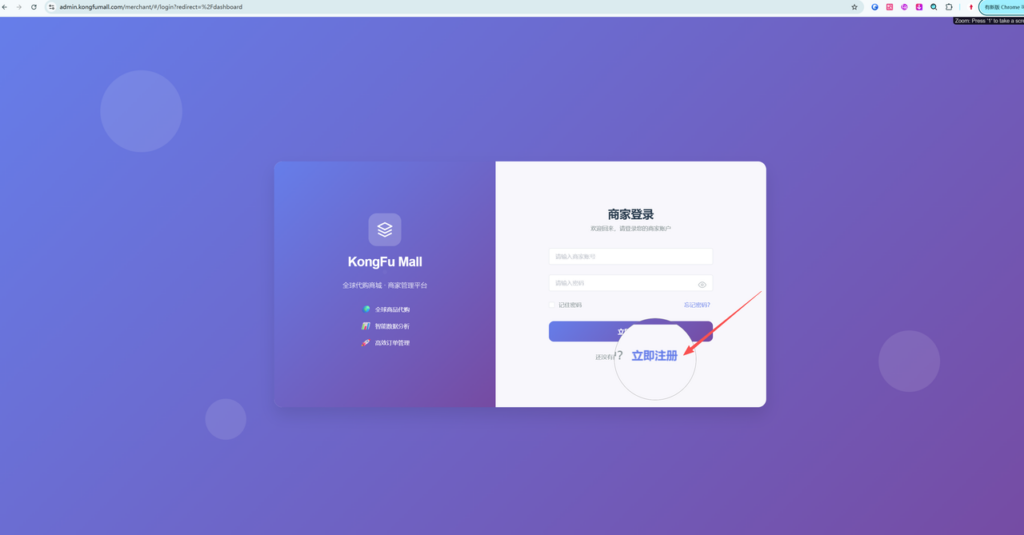
- Click Register Now to open the registration page (skip this step if you already have an account).
- Fill in the information as required, agree to our policies, and finally click Register Now.
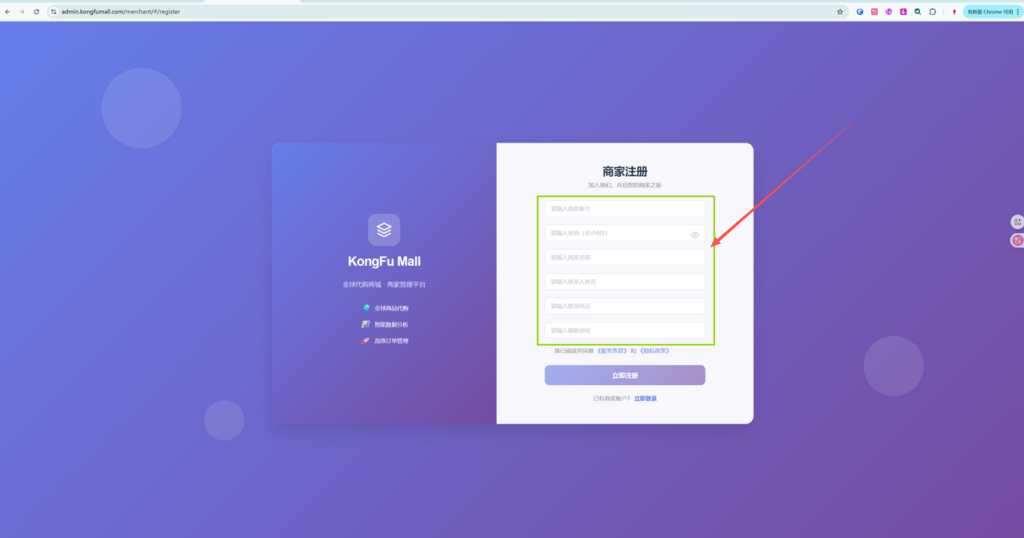
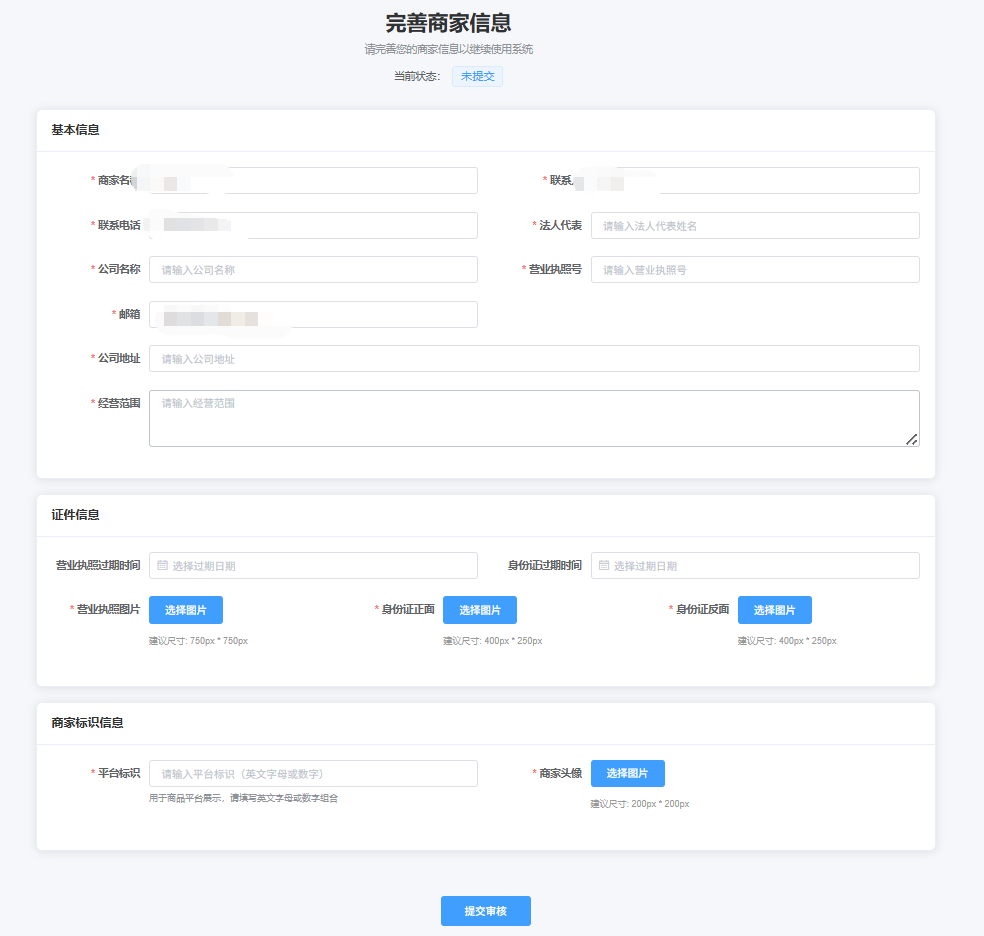
- After completing the relevant information in the image, click to submit for review.
- Please wait for our review. Once approved, you may log in from the login page. (Should you encounter any issues, please contact us promptly.)
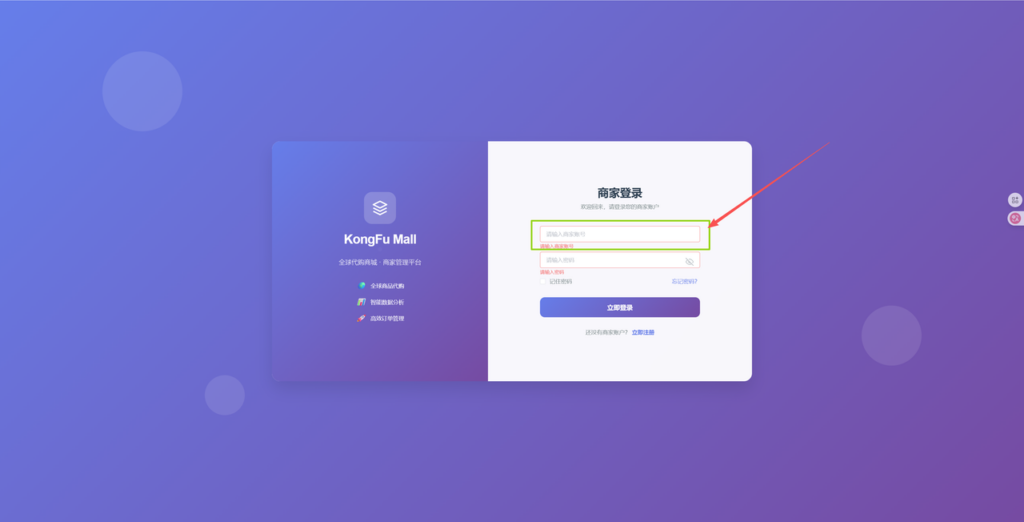
- For the account you wish to log in to, please enter your account name. Currently, email addresses cannot be used for login (we will optimize this feature in the future).
2. Backend Feature Overview
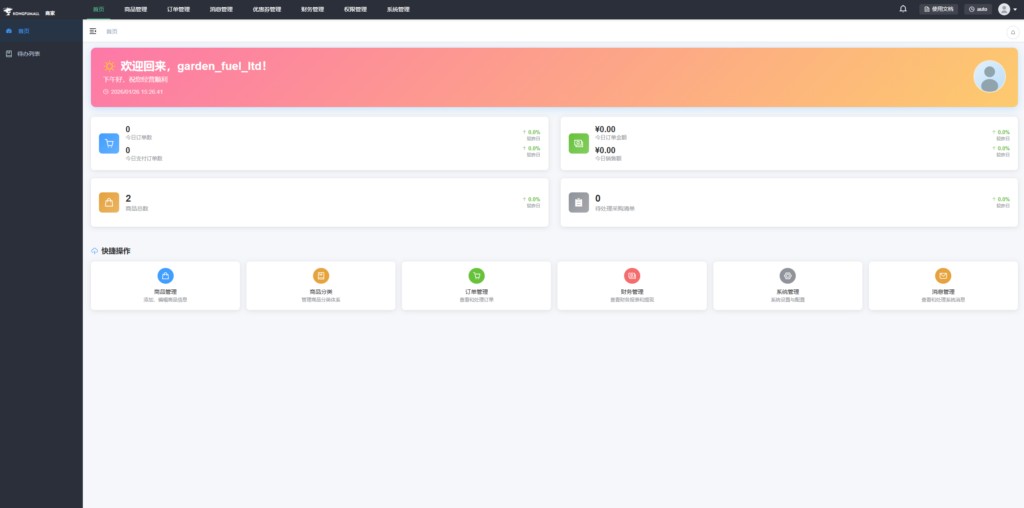
Upon entering our dashboard page, let's explore each tab category step by step.
This section provides an overview of Today's Orders, Total Revenue, Total Products, and Pending Purchase Orders.
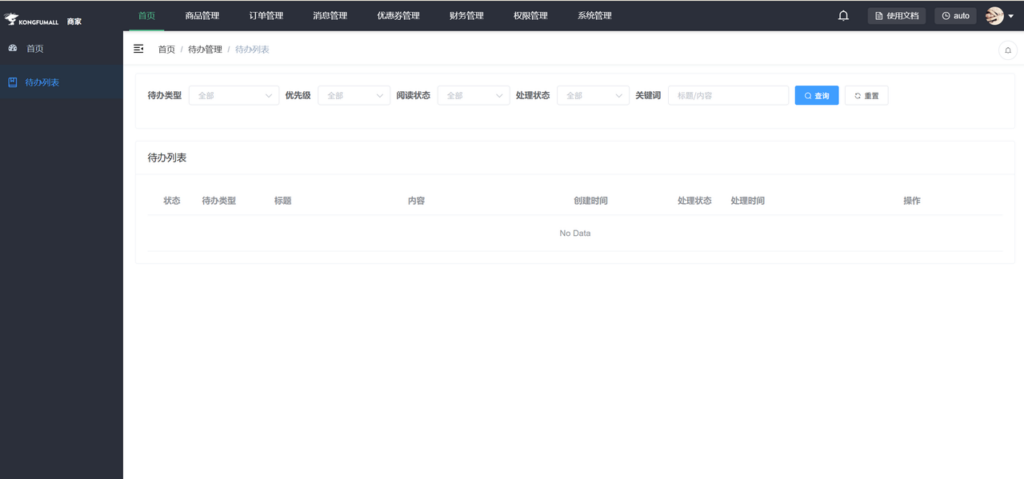
To-Do List: Specific details include: Merchant order payment reminders, Merchant order shipment reminders (24 hours), Merchant order shipment timeout (48 hours).
The quick actions below will be covered separately later.
3. Merchandise Management
Divided into eight major sections
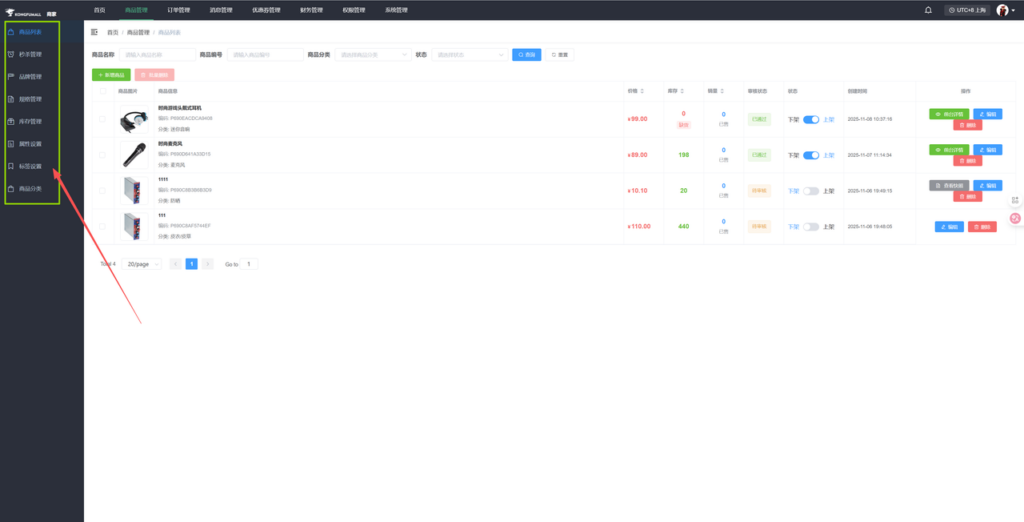
3.1 Product List
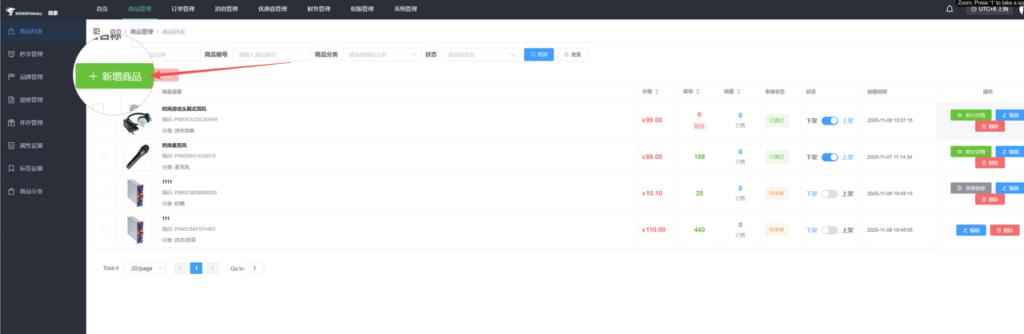
- To view all products and their status, we first add a product.
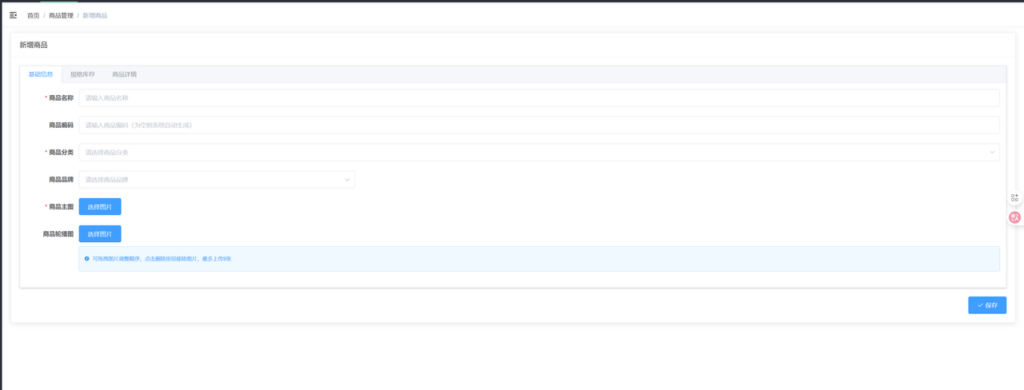
Basic Information:
- Enter your product title. (Language is not restricted; frontend translation is available.)
- You may manually enter the code. Leaving it blank will generate one automatically. (If you wish to organize items based on your SKU, enter it manually.)
- Select the corresponding product category. This is a checkbox selection-no manual input required. (If no suitable category exists, add one via Product Categories. New categories require approval and won't appear immediately. Choose the most relevant category; otherwise, the product cannot be listed.)
- Product Brand (i.e., your trademark/license) can be added in Brand Management.
- Product Main Image (i.e., the primary image-only one allowed).
- Product Carousel Images (i.e., detail images-limited to 9 images
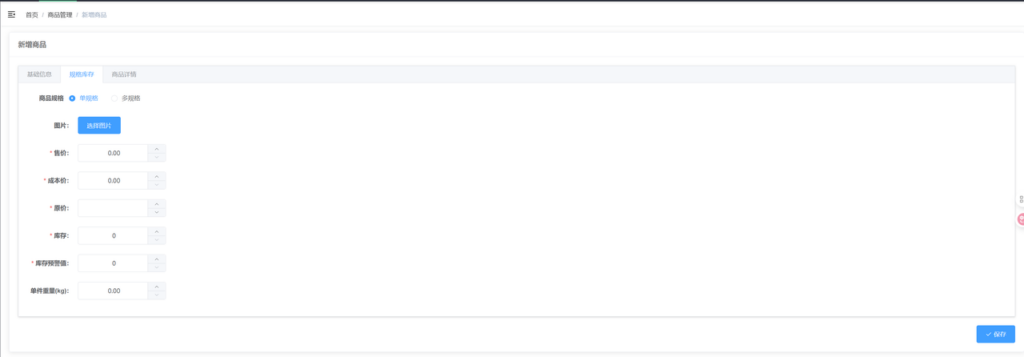
3.1.1 Specification Inventory
Single specification:
- Single specification means the product has no options. There is only one price and one variant (e.g., color, size, etc.).
- Image: Select one main image.
- Fill in the selling price.
- Cost price: Estimate your profit margin for calculation purposes.
- Original price: Enter the same value as the selling price.
- Inventory: Enter actual quantity. If inventory is unlimited, enter 999 or 9999.
- Inventory alert threshold: We will notify you via message when stock reaches this set quantity.
- Unit weight: Enter actual weight.
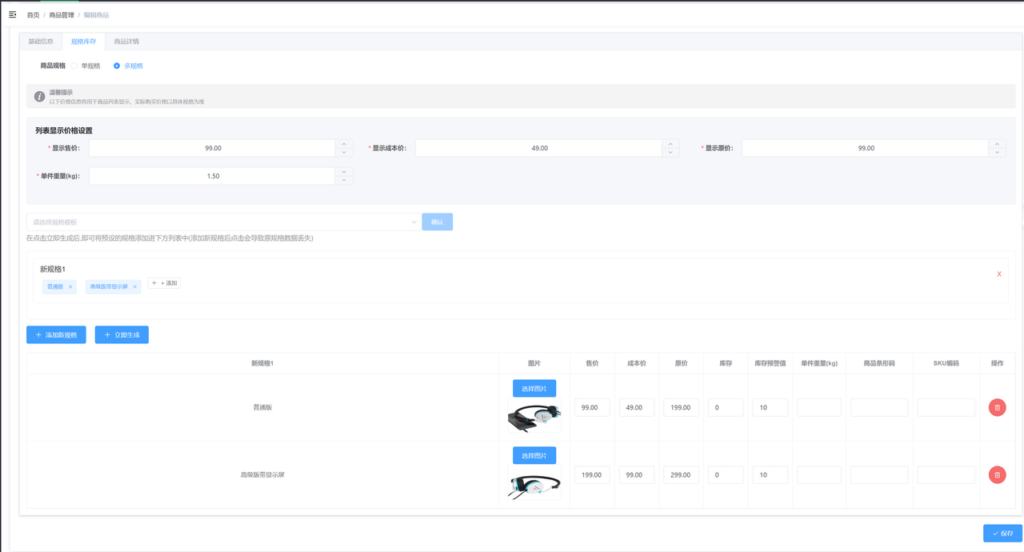
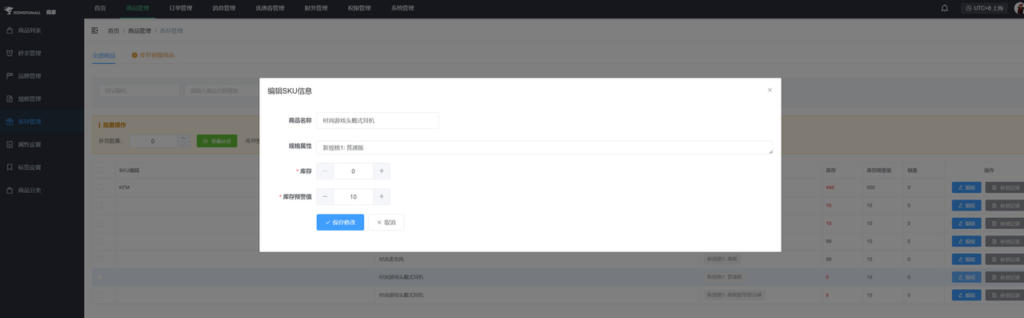
Multiple specifications:
- Selling Price, Cost Price, Original Price, Unit Weight (same as per specification, fill in actual value)
- Specification Template: If not added in the backend, skip this step.
- Clicking "Add New Specification" will populate the fields with the information entered above.

- If using the default values and generating immediately, the above values will be substituted as shown in the figure above.
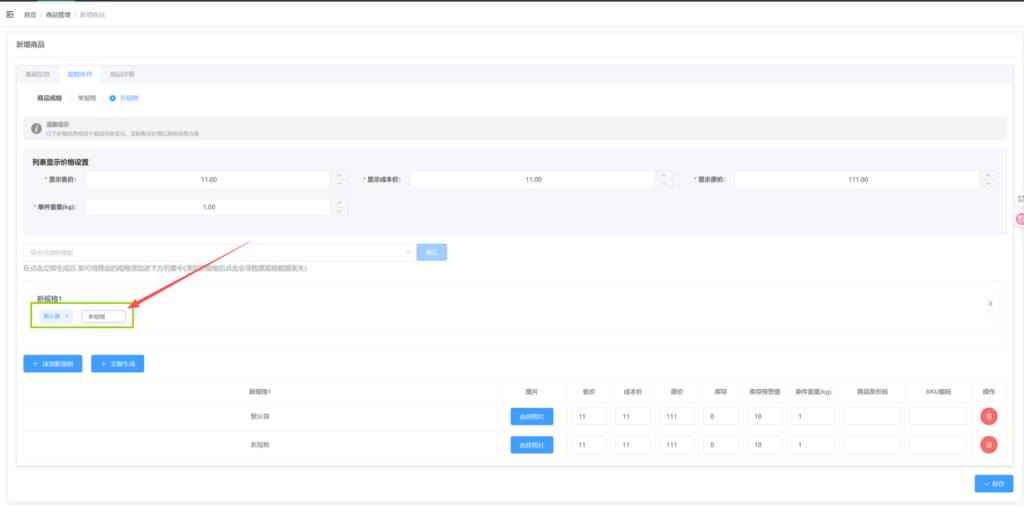
Default values or newly added specifications can have their names modified directly. Enter as many specifications as there are options.
- We set different images for different specifications. This image is the main product photo that appears when users select the corresponding option.
- Selling price, cost price, original price, inventory, inventory alert, and unit weight (these are the same as for a single specification, but separated based on different variables).
- Product barcode and SKU code-skip for now, no need to fill in.
- Refer to the following template:
3.1.2 Product Details
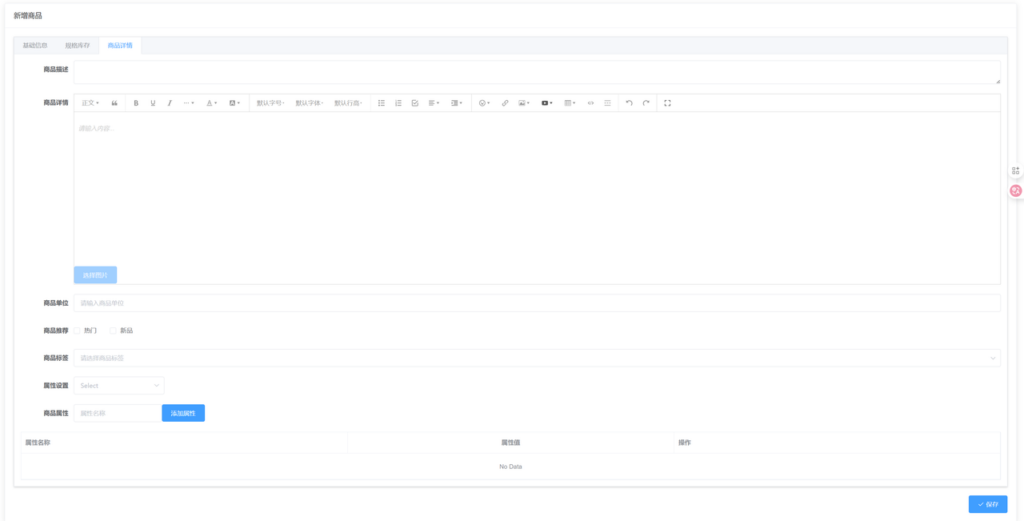
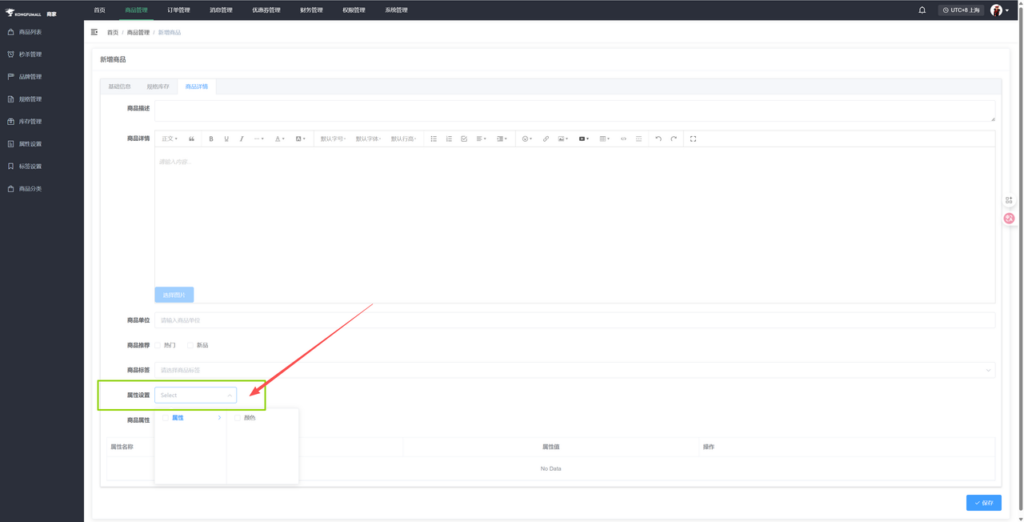
- Product Description: Provide a detailed description of your item. (Used for search engine crawling)
- Product Details: Displayed at the bottom of the main image. Describe your product information and introduction in detail. Supports image and table insertion; video support is currently unavailable.
- Unit: Specify the actual unit, e.g., piece, pair, etc.
- Product Recommendations: Select "Popular" or "New Arrivals" (Backend will review during product submission).
- Product Tags: Must be added in Tag Settings to be selectable (can be left blank).
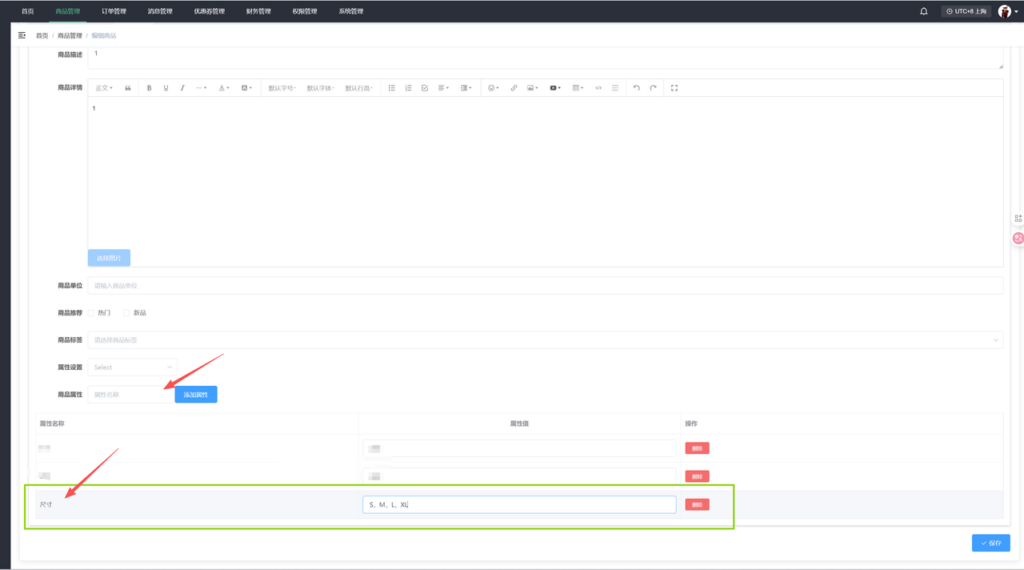
- Product Attributes: Considered product specifications. If not filled, they won't display. For example, sizes like X, XL. Refer to the image below. Finally, click Save.
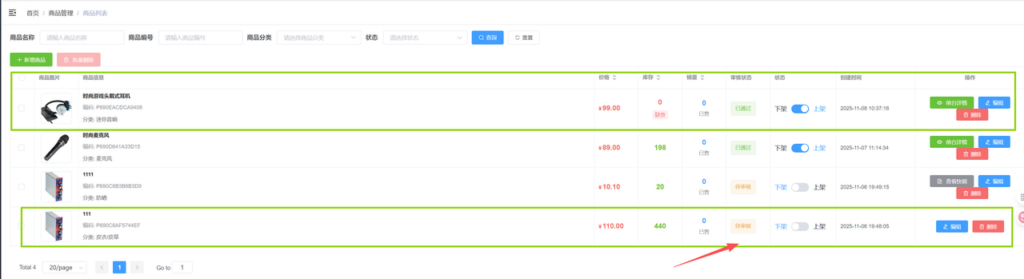
After saving the product, it will be in the Offline status. Please switch it to the Online status, and it will then be in the Pending Review status.
Once the review is successful, the product will be in the Approved, Online status.
This is the difference between the two statuses.
3.2 Flash Sale Management
On fixed holidays, we can launch flash sales, such as Black Friday, Christmas, and so on.
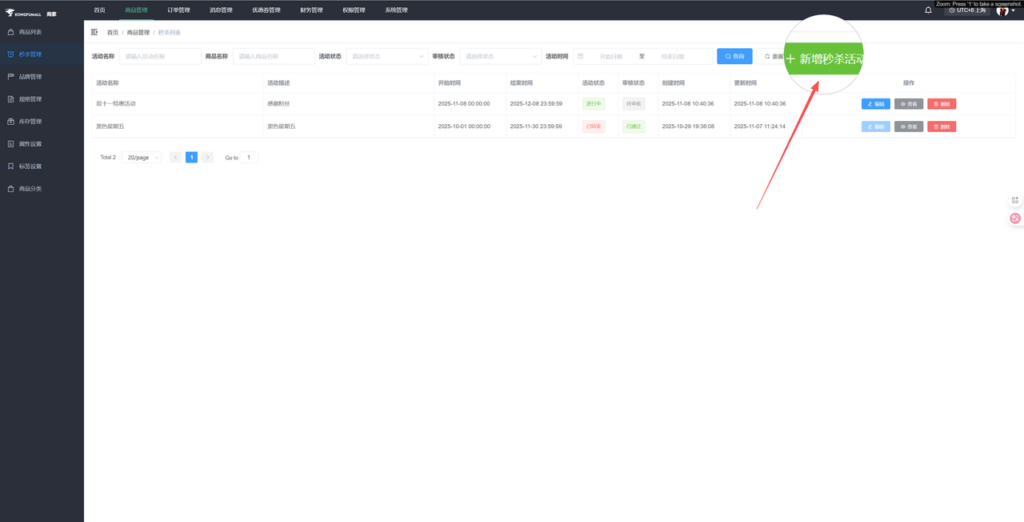
Click "Add Flash Sale Event" and refer to the following template.

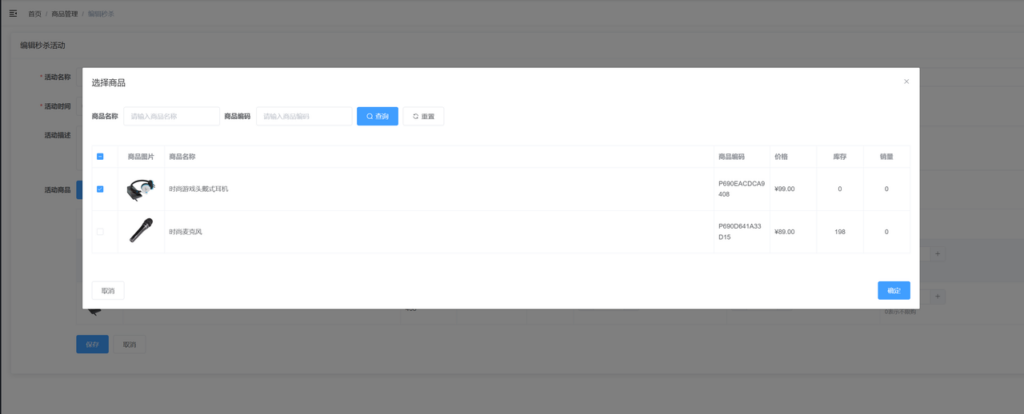
- Please note that when adding products, you can only select items that have been approved.
- Each product can only participate in one promotion. If you have two promotions running, a product participating in one promotion will not appear in the second promotion.
Finally, click Save.
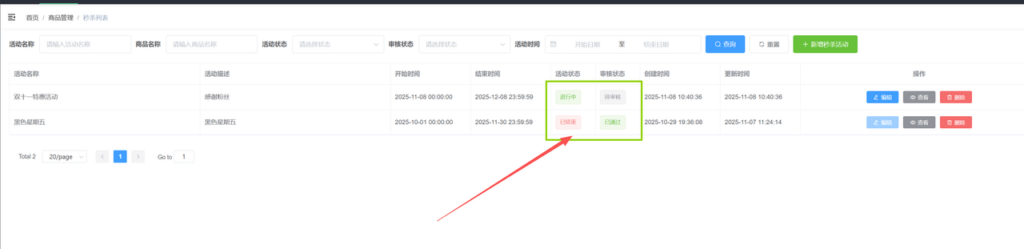
After launching a flash sale, it will enter the review process. Once approved, your products will appear in the front-end flash sale section. The sorting order is automatically determined by your posting time. If other merchants launch sales later, their listings will appear after yours.
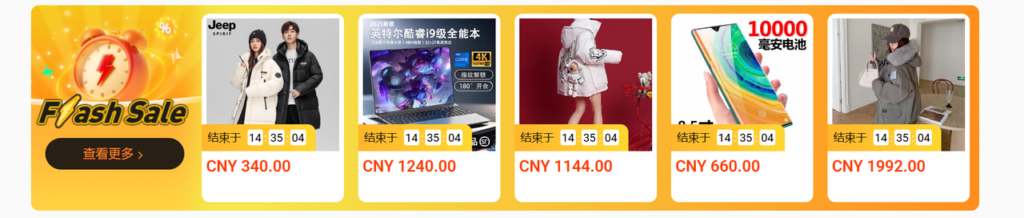
- Please note that once an event is published and approved, it cannot be edited. (If you encounter any issues, please contact customer service promptly.)
3.3 Brand Management
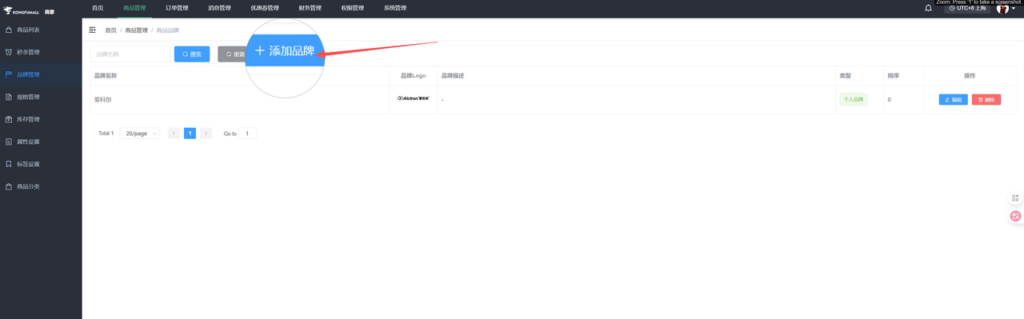
To add a brand, please refer to the following template.
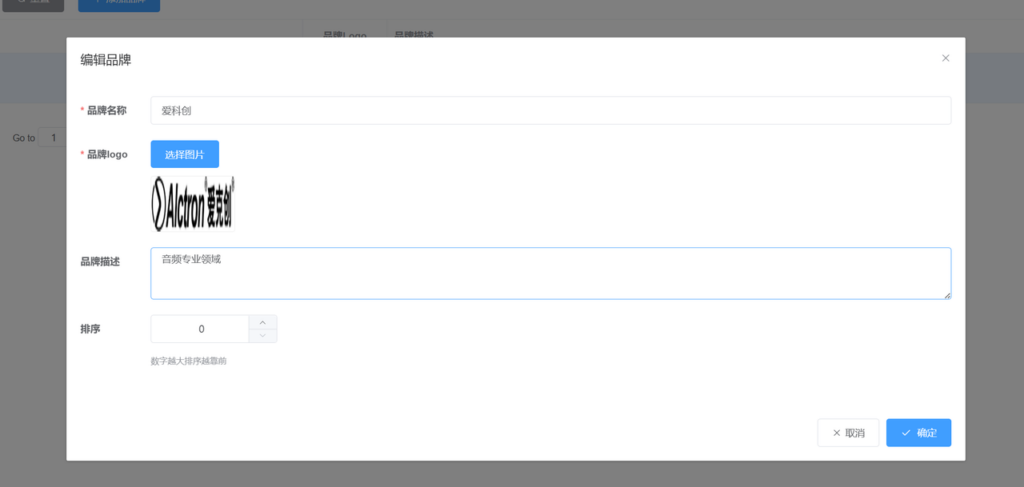
- Of course, you can create multiple brands, but be mindful of actual licensing and qualifications to avoid product review failures later on.
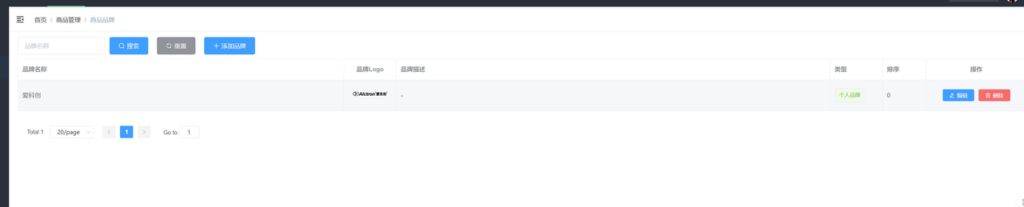
Brands themselves are not subject to review, but the brands listed within the product descriptions are reviewed.
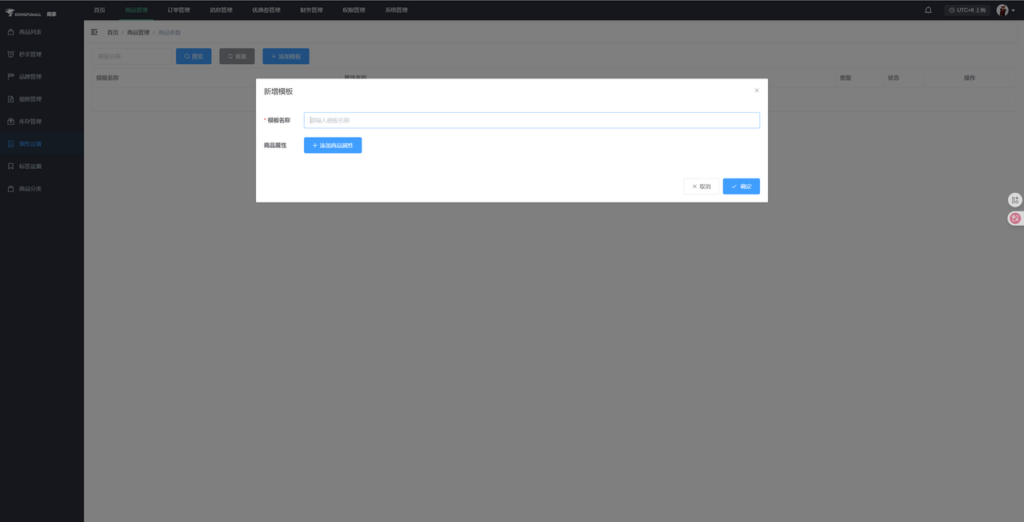
3.4 Specification Management
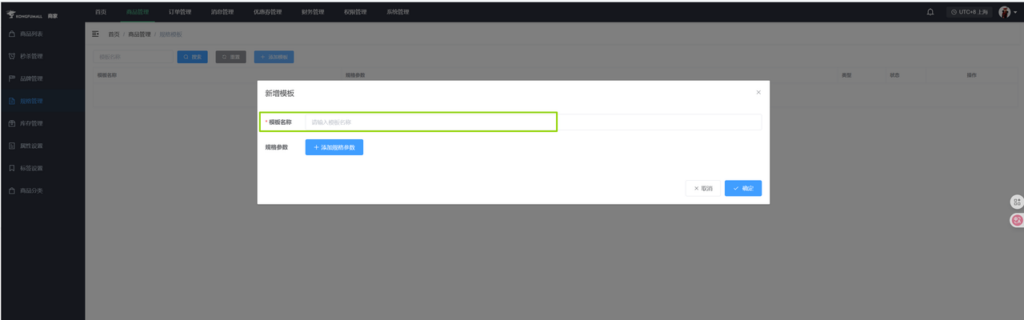
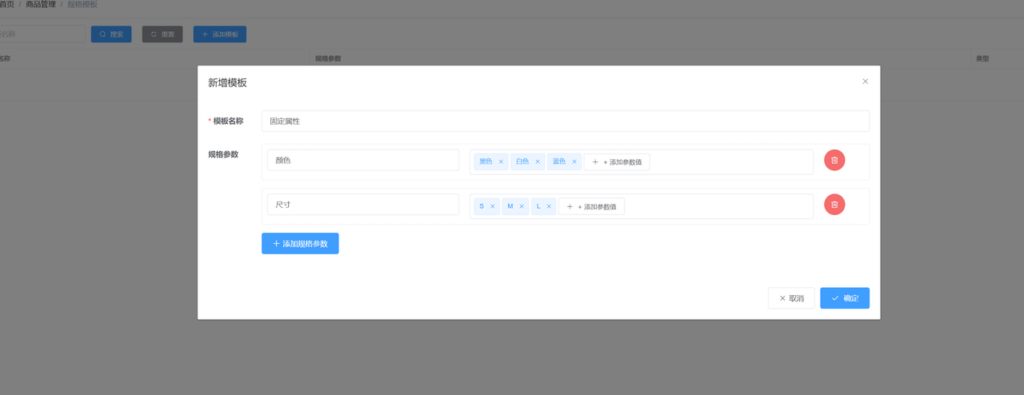
- For certain fixed attributes like color and size, specification templates can be used for setup.
- When adding products, templates can speed up the process and allow for creating multiple entries.
- Multiple specifications can be selected.


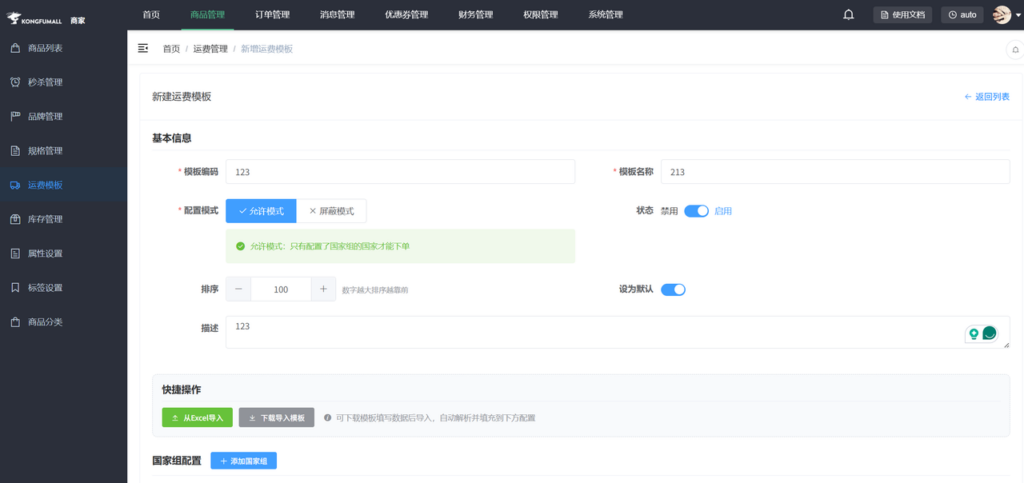
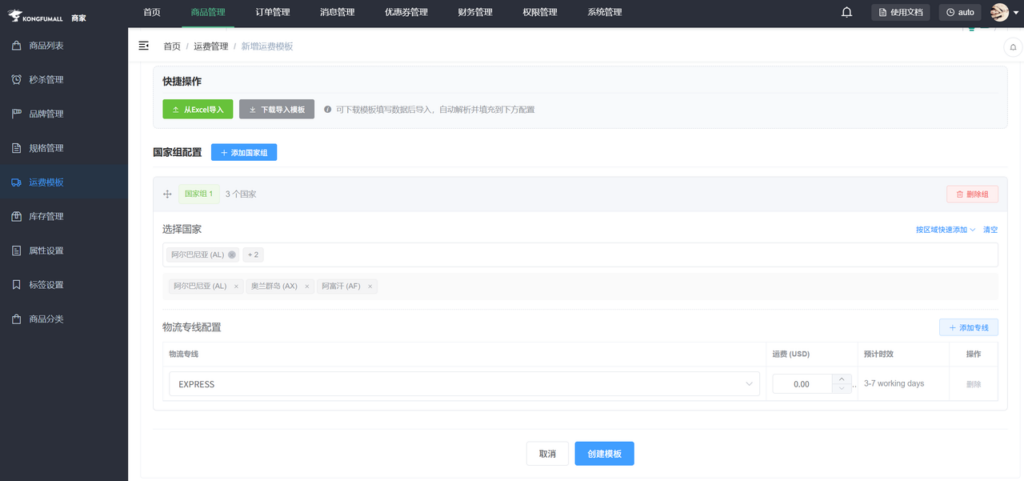
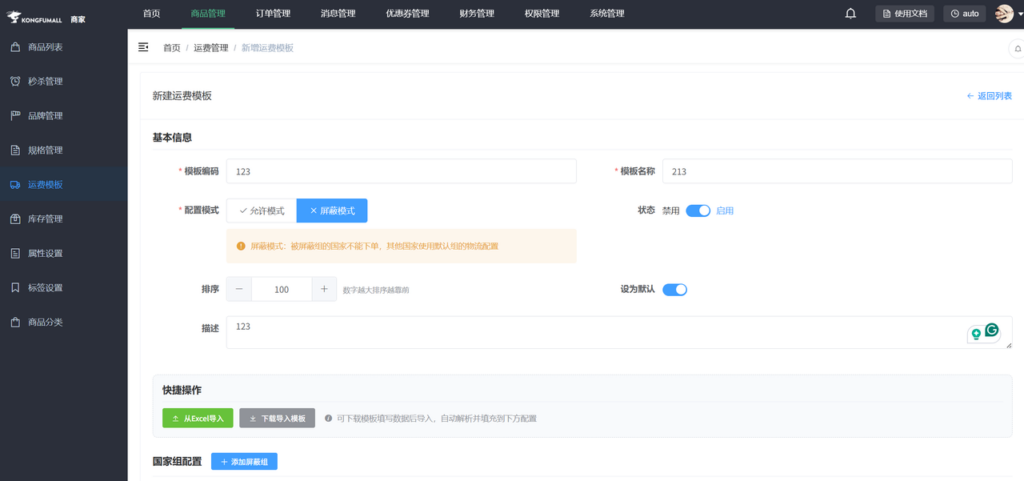
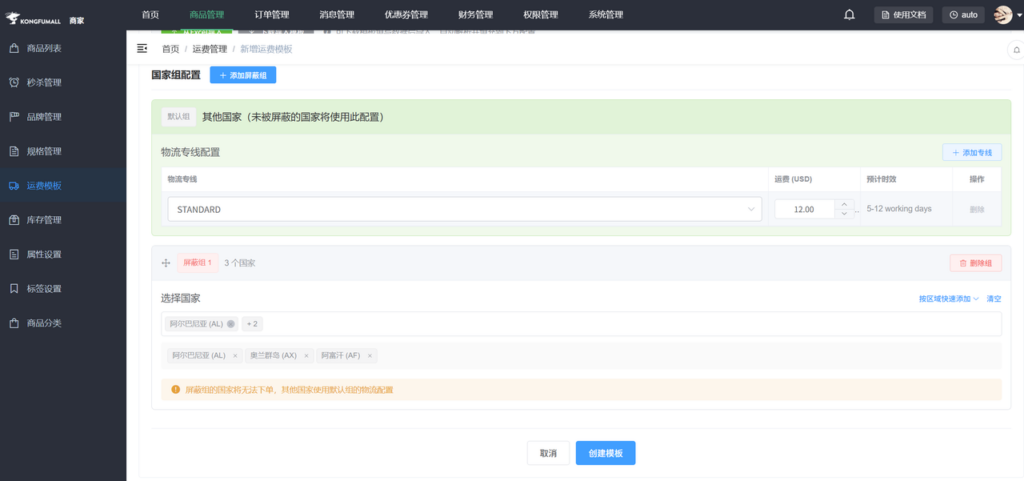
3.5 Shipping Template
Shipping Template Modes
Allow Mode: Only countries configured within a country group can place orders. Add country groups below and select countries permitted to use this shipping template. Then configure dedicated logistics routes. When users place orders, countries in the allowed country group will automatically select the dedicated logistics routes configured for the Allow Mode.
Blocked Mode: Countries in blocked groups cannot place orders, while other countries use the default group's shipping settings. Users from countries designated as blocked groups cannot place orders, while users from other countries will use the default shipping settings.
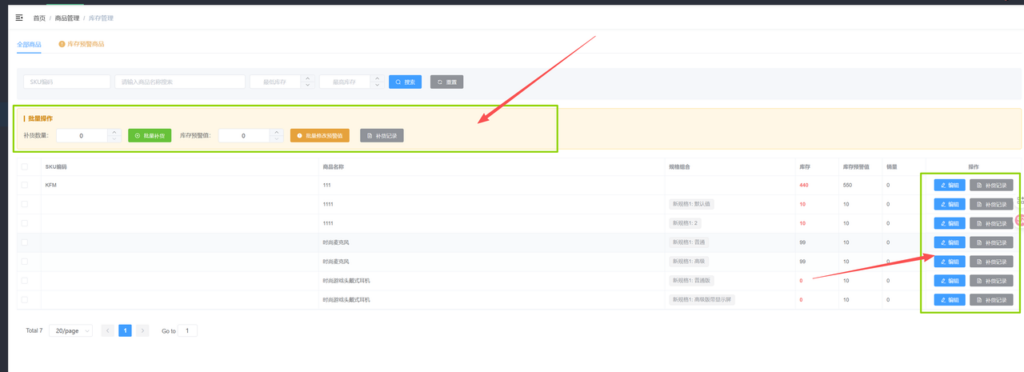
3.6 Inventory Management
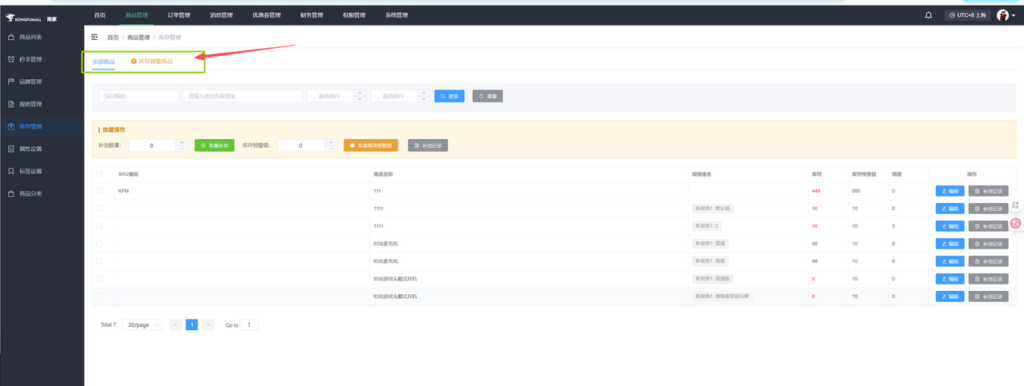
- Divided into All Products and Stock Alert Products
- Can be added in bulk for all products or individually for single products
- Also allows viewing records for tracking purposes
- Search by product name or SKU to check
3.7 Property Settings
- Similar to specification attributes (selected from the attributes section below the product details, just in a different location)

3.8 Label Settings
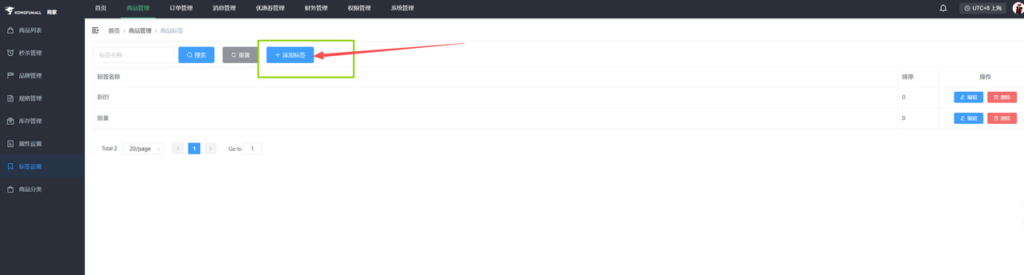
- Tags are easier to grasp-they represent a more granular level of classification beyond the initial categorization.
- Fill in as needed.
3.9 Product Categories
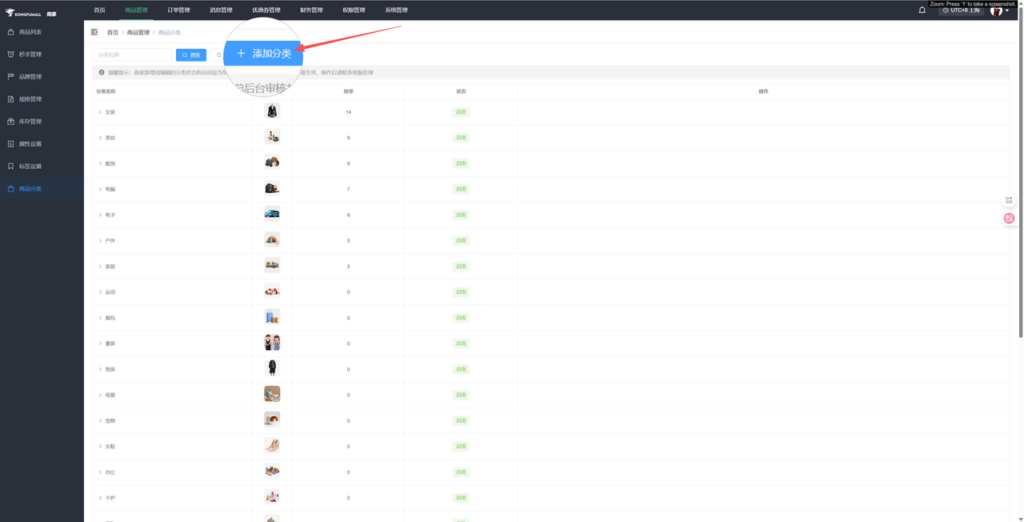
The categories displayed here are predefined by the platform. If you don't see the category you need, click Add Category.
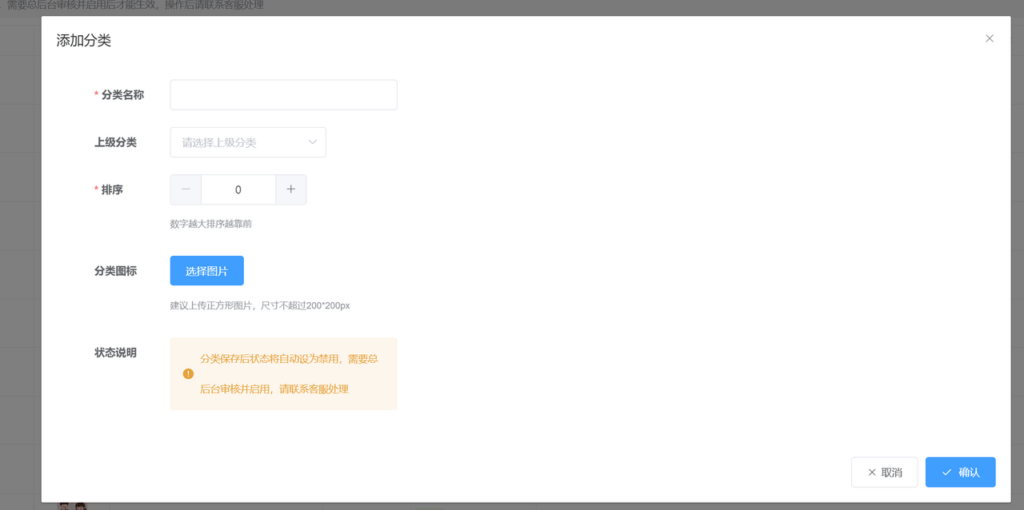
Enter the category name. For top-level categories, no parent category is required. Sort by number-higher numbers appear earlier. Select a category icon, then click Confirm. Entries will enter review and appear on the front end only after approval.
4. Order Management
4.1 Order List
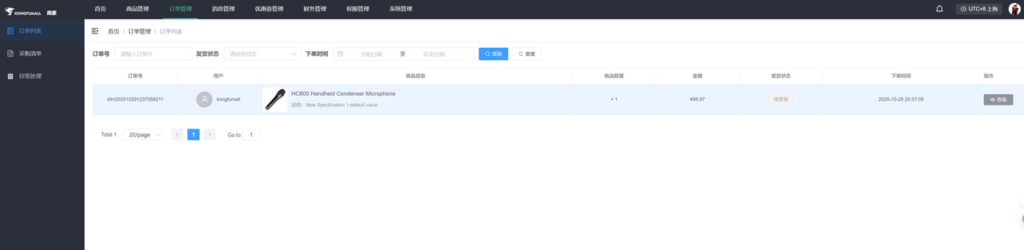
- After the customer completes payment on the front end, you can view the status of their order here.
- This is for viewing only; no action is required on your part.
4.2 Receiving List
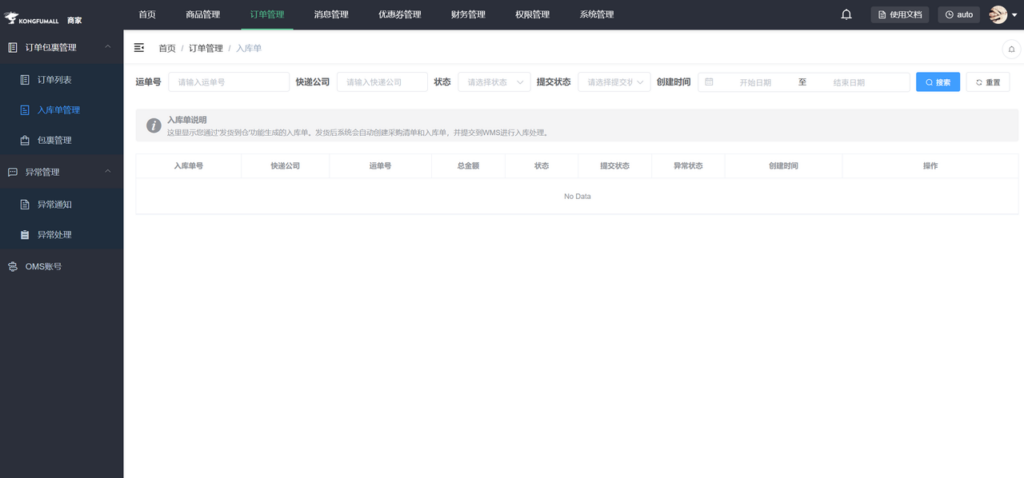
This displays the goods receipt notes generated through the 'Ship to Warehouse' feature. After shipment, the system automatically creates purchase lists and goods receipt notes, then submits them to the WMS for inventory processing.
4.3 Package Management
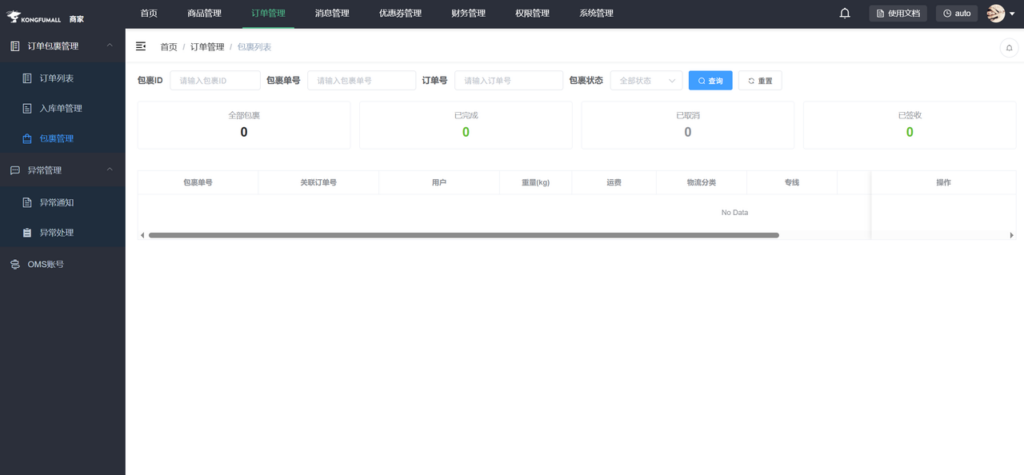
This section displays packages you've sent to the warehouse using the "Ship to Warehouse" feature.
4.4 Abnormal Notification
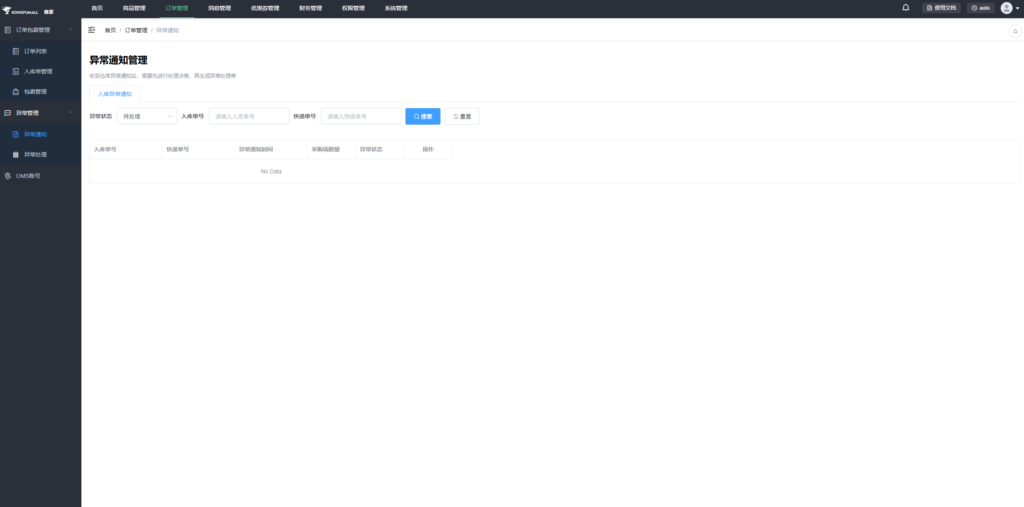
Upon receiving a warehouse exception notification, you must first make a processing decision before generating an exception handling form. For example, you can choose to ship all items, ship a portion of items, or hold the order for further action.
4.5 Exception Handling
Exception handling refers to the process of performing exchange or reissuance operations for items with abnormal serial numbers.
4.6 OMS Account
OMS accounts require warehouse authorization to make decisions regarding the handling of the above exceptions.
5. Message Management
5.1 Message List
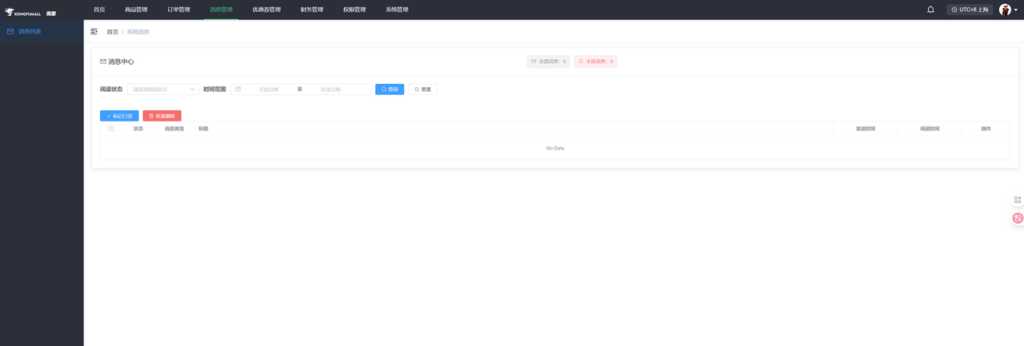
- Here you can view platform notifications and order-related alerts.
- Organized into read and unread sections.
- You can also search by status and time (when messages are numerous).
6. Coupon Management
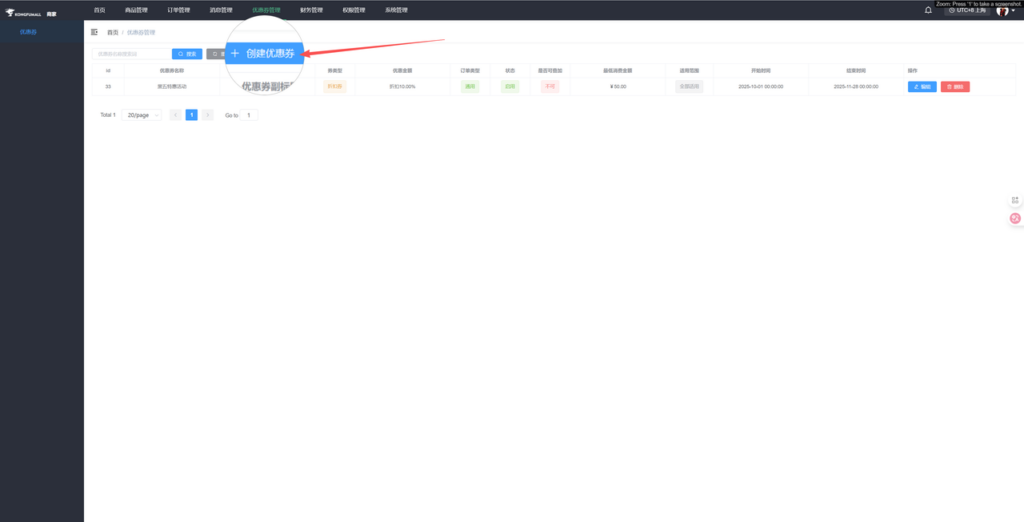
- Create a coupon
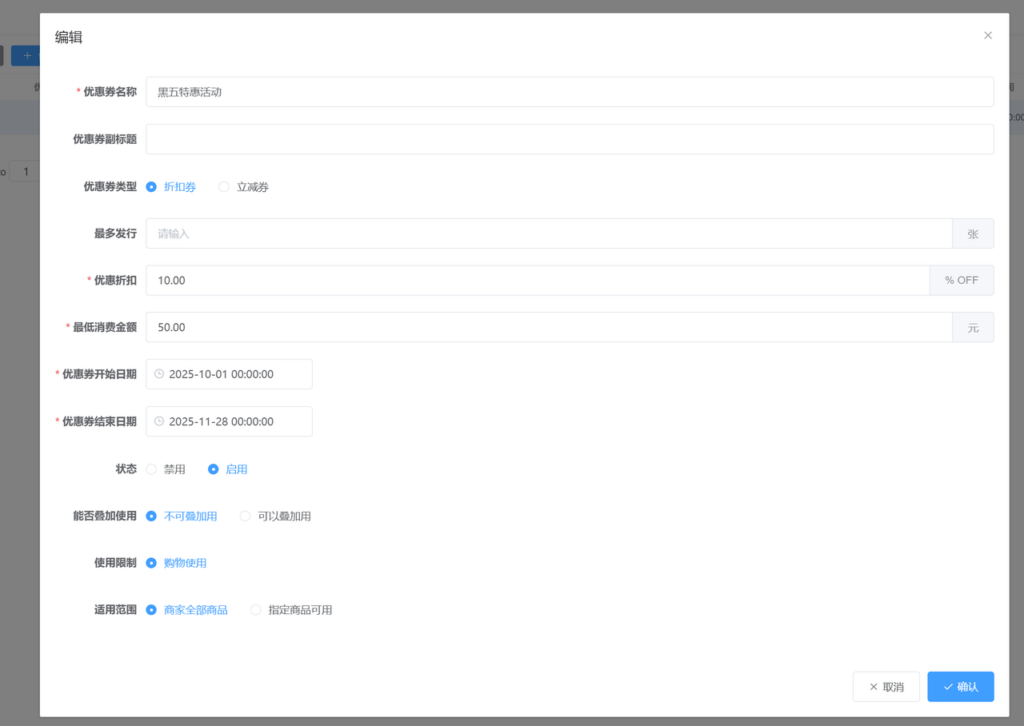
- You may refer to the above template.
- Please note that coupons are categorized into discount coupons and instant discount coupons (one offers a percentage discount, while the other reduces the total checkout amount).
- A minimum purchase amount can be set; entering 0 indicates no minimum requirement.
- Fill in the details for stacking restrictions, usage limitations, and applicable scope based on actual circumstances. (If "Applicable Scope" is set to "Specified Products," an additional step is required to select the corresponding products.)
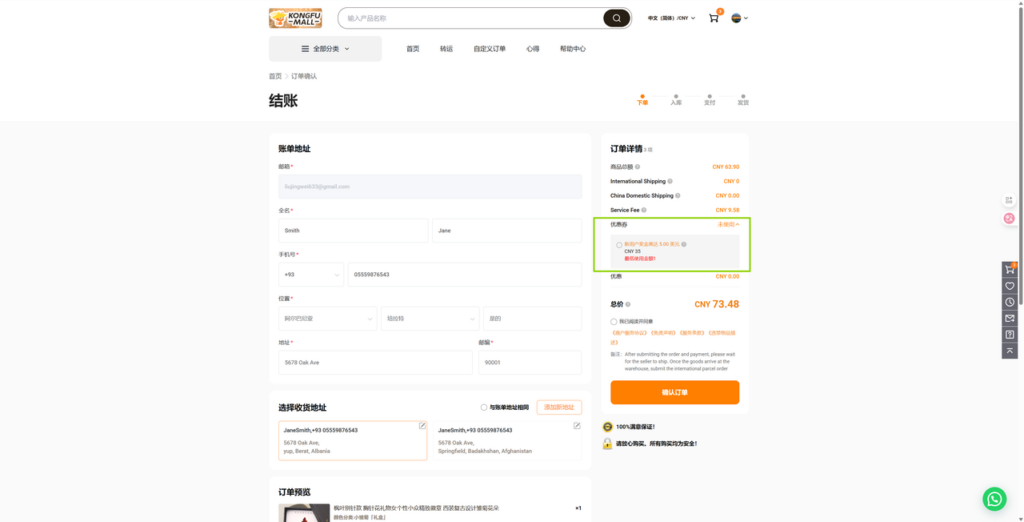
Users can add usage in the frontend.
7. Financial Management
7.1 Monthly Sales Revenue
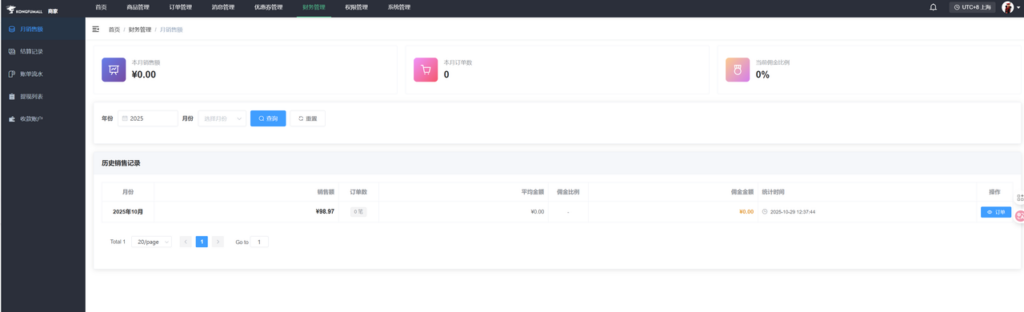
- This month's sales: Calculated based on the current month's revenue
- This month's order count: Each order counts as one transaction
- Current commission rate: Finalized according to your agreement with the platform (contact customer service for inquiries)
- Search records from different time periods
- Every sale is recorded
7.2 Settlement Records
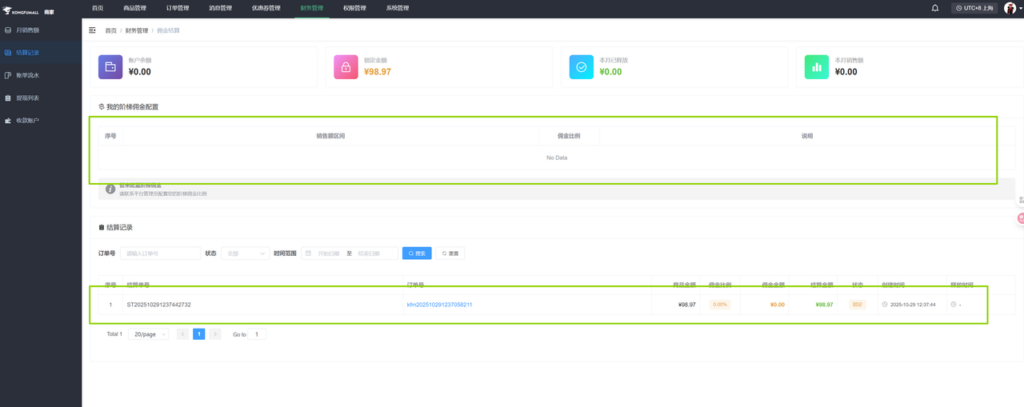
- Account balance refers to the amount remaining after deducting all fees.
- Locked amount indicates funds held in escrow while an order is still in progress.
- This month's released funds: Merchants may apply for release between the 1st and 14th of each month, and the platform will also automatically release funds.
- This month's sales amount: Only the current month's sales revenue remains.
- Tiered commission configurations are also available; contact customer service for details.
- Searchable settlement records show transaction amounts and statuses.
7.3 Account Statement
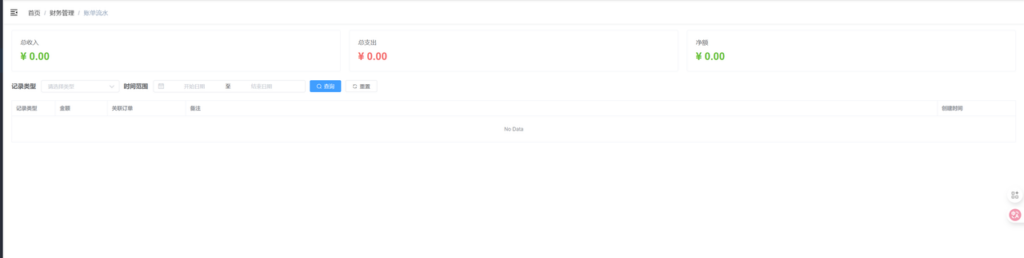
- Total income is the cumulative amount before deducting expenses.
- Total expenses refer to cash withdrawals.
- Net income is the amount remaining after subtracting total expenses from total income.
- Query functionality is also supported.
7.4 Withdrawal List
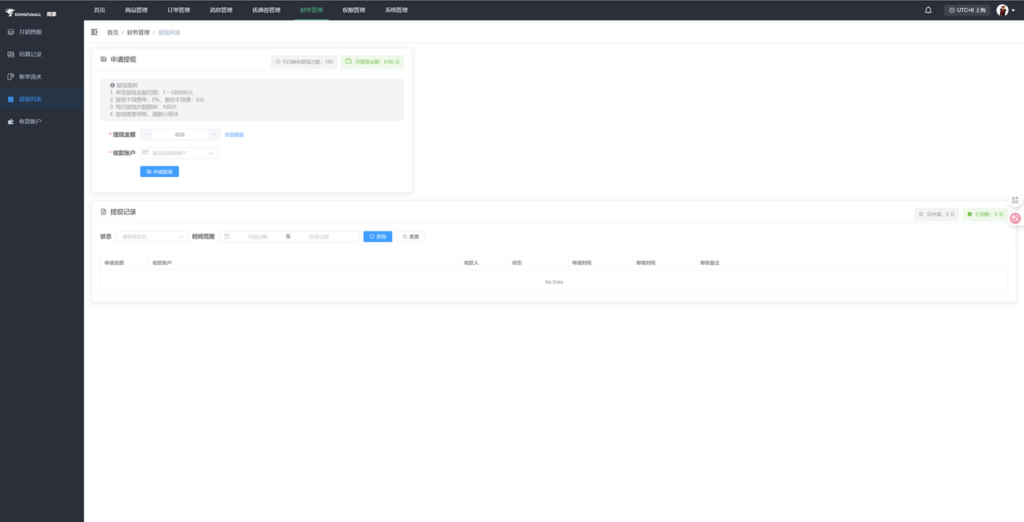
- You may withdraw a portion of the amount or the entire balance.
- Select the receiving account, click "Request Withdrawal," and wait for backend review.
7.5 Receiving Account
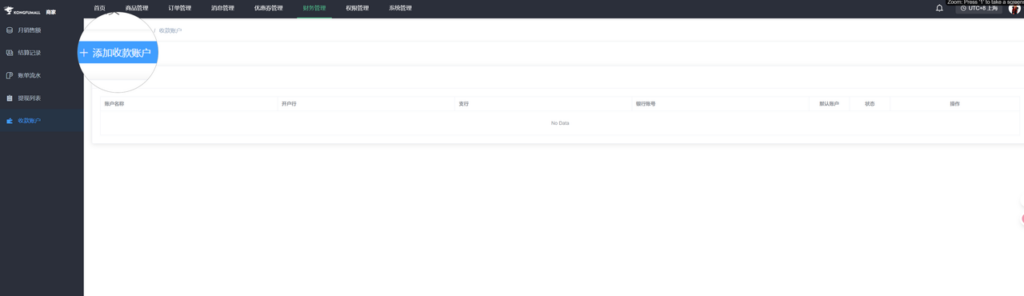
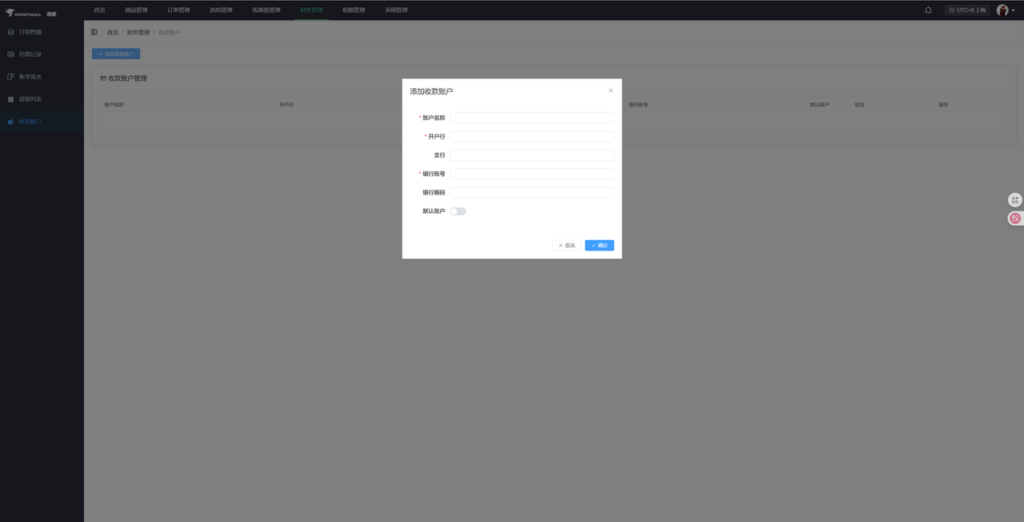
- Add account and fill in details as appropriate.
- If you have multiple accounts, you can select one as the default account.
8. Permission Management
8.1 Administrator Management
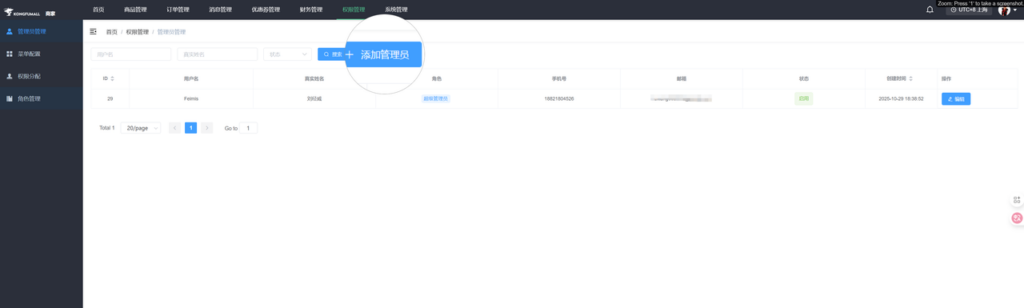
- Different roles can be added, such as administrators, store clerks, etc.
- When user numbers grow too large later on, the search function can be used to locate them.
8.2 Menu Configuration
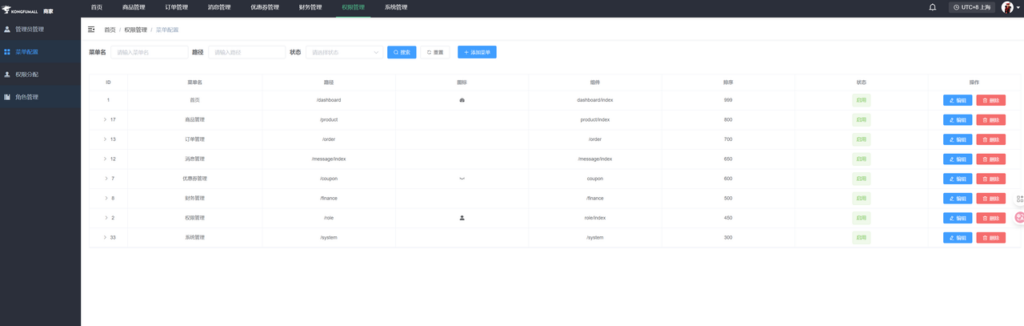
- Configuration of the Top Menu
- Generally does not require modification.
8.3 Permission Assignment
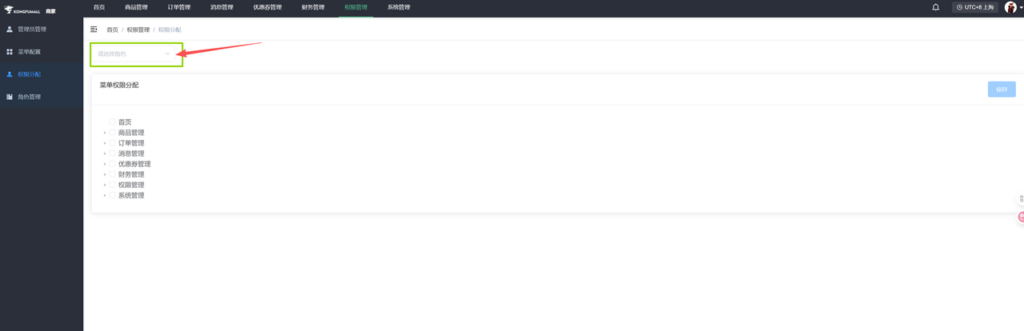
- If you add new roles or existing roles, you must grant them permissions.
8.4 Role Management
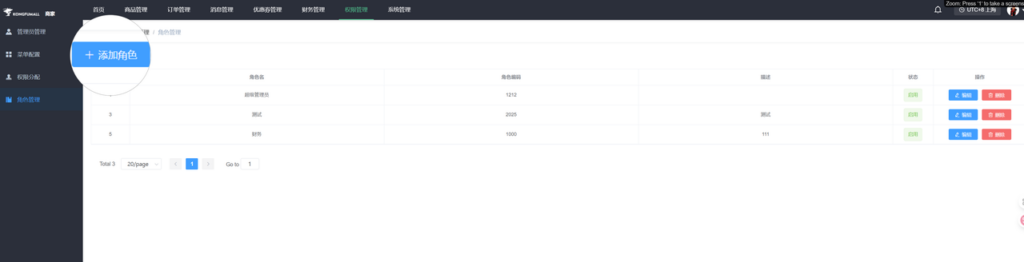
- Add roles: You can add new roles, edit existing ones, or disable other roles.
- Delete: Be careful not to delete the administrator role.

9. System Management
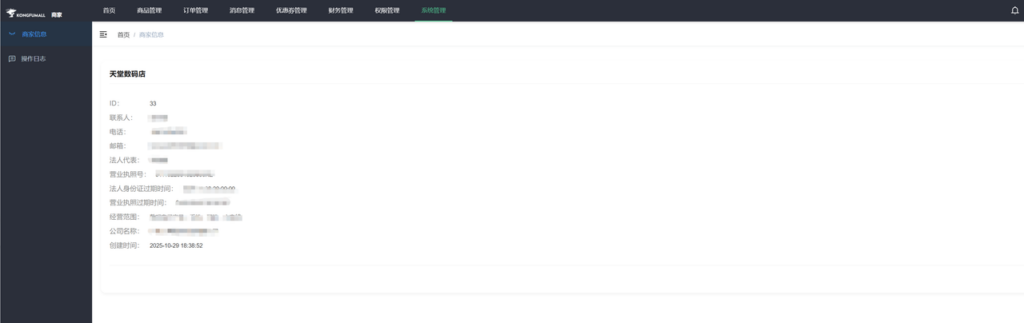
- Merchant information refers to the details provided during registration. You may edit this information, and any changes will be subject to review.
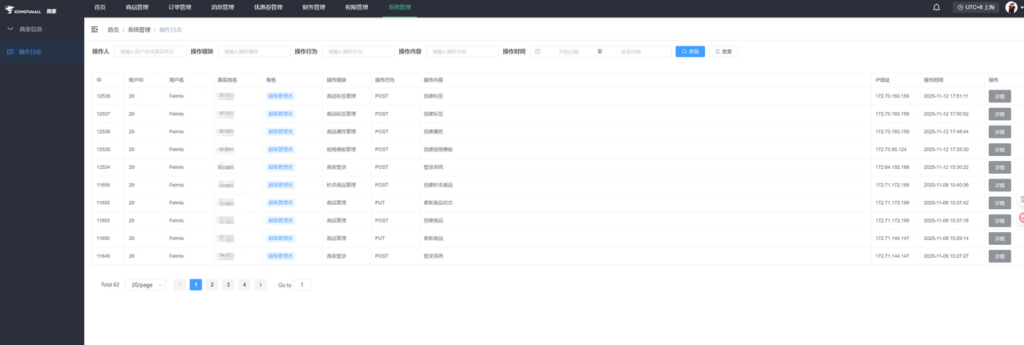
- The operation log displays the activity records for each role.